
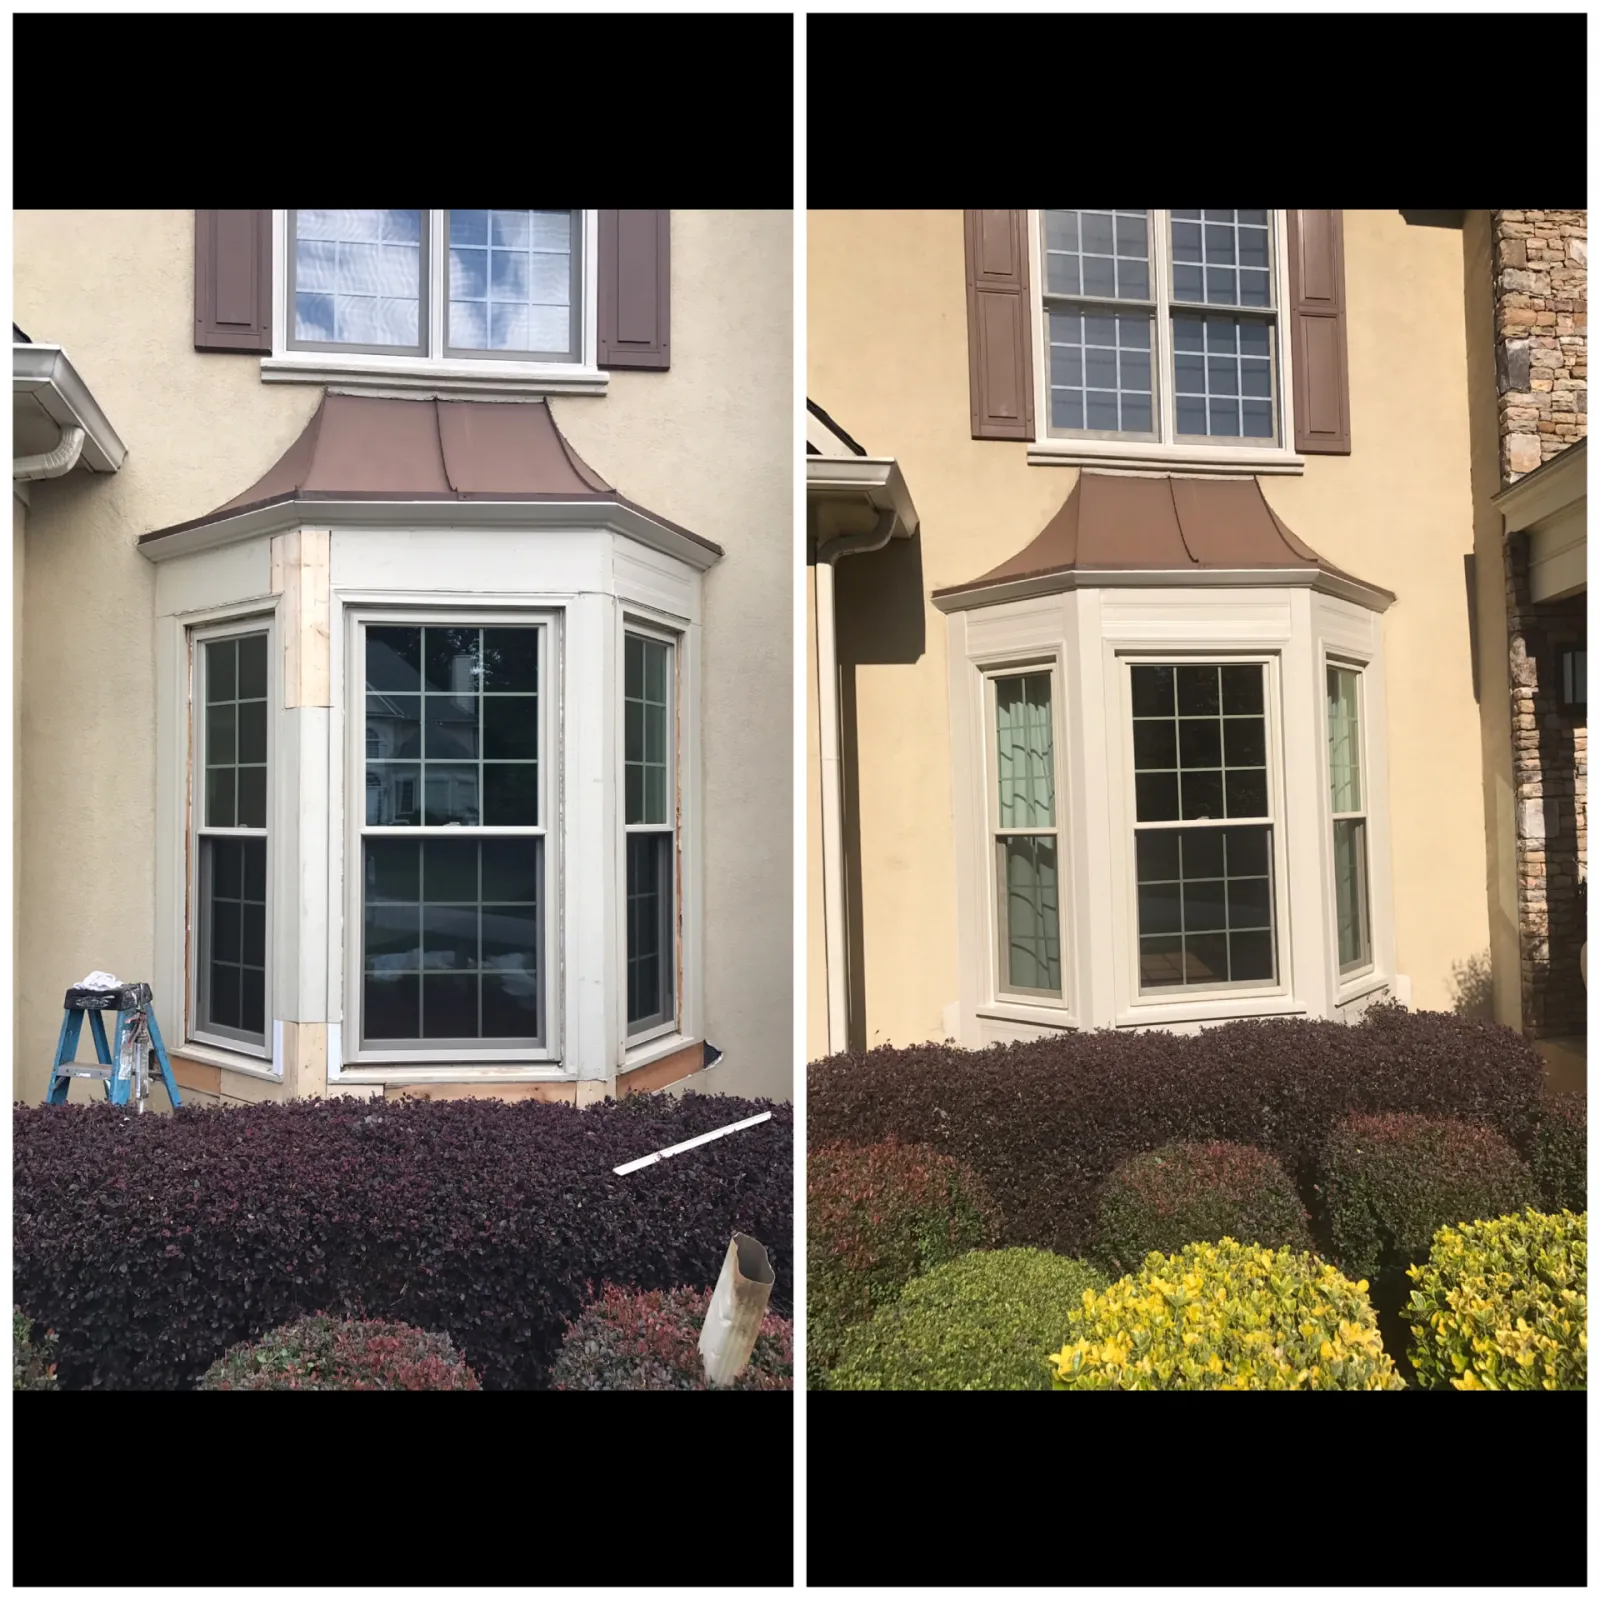
The before and after above is a stucco home in the Buford area with a copper style bay window cap. Look at the left side and you can see bare wood where trim had been removed, the raw jamb exposed, and old paint that had been failing at the joints. The right side is a finished, rebuilt bay: new trim, proper joints, and the same copper cap sitting on top of it.
Homeowners rarely think of that little cap as a roof. It is. It has a pitch, a valley or two, hips, a wall junction and a drainage path, all in a footprint of about fifteen square feet. And because it sits directly over a window and directly against a wall, when it fails the water goes somewhere expensive.
Why bay caps fail first
A bay window cap has more linear feet of transition per square foot of roof than any other part of your house. Every transition is a chance to get it wrong:
- The wall junction. Where the cap dies into the wall, water wants to run behind it. That requires flashing turned up behind the wall cladding, not a bead of sealant on top.
- The low pitch. Caps are often built shallow for looks. Shallow pitch means water moves slowly and wind pushes it uphill.
- Debris. Pine straw and oak leaves pile in the small valleys of a cap and hold water for days after a storm.
- Termination at stucco or brick. Both materials are absorbent and unforgiving. Sealant at that line is a maintenance item, not a solution.
What we find when we take a cap apart
On the Buford project pictured, and on most similar jobs:
- 1.Sealant instead of counterflashing at the wall.
- 2.Underlayment that stopped short of the wall plane, so the last two inches of sheathing had no protection.
- 3.Soft sheathing and darkened framing at the corners, which is exactly why the trim below could never hold paint.
- 4.Original builder pine trim with no back priming, wicking water along the grain.
None of that is unusual and none of it means the house was built badly by the standards of the time. It means the assembly reached the end of its service life and the flashing was never designed to be permanent.
How we rebuild it
Remove the cap carefully. If it is copper or a quality standing seam panel, we plan to reuse it. That takes patience with the seams and fasteners, but it saves the homeowner money and keeps the look.
Cut back to solid material. Sheathing and framing get replaced until a screwdriver stops sinking, plus a margin. Rot travels along grain farther than the stain suggests.
Rebuild the water layers in the correct order. Ice and water shield across the whole cap because it is small and low pitched, then metal drip edge, then step flashing at the wall with the upper leg behind the cladding, then the cap.
Handle the wall termination properly. On stucco that means a reglet or a proper receiver so flashing turns up behind the plane. On brick it means through wall or reglet counterflashing. On siding it means running the flashing under the housewrap so gravity finishes the job.
Add a kickout if the cap edge meets a wall. A two dollar detail that prevents a five thousand dollar repair. Water gets pushed out into the gutter system instead of running behind siding.
Replace trim with material that will not rot. Cellular PVC or fiber cement, prime every cut, then paint with a proper acrylic system through our exterior painting crew.
Why stucco homes in Buford need extra attention
A lot of the housing stock around Buford, Sugar Hill and the Lake Lanier corridor uses stucco or a stucco and stone combination. Traditional hard coat and synthetic stucco both retain moisture at the surface and both are unforgiving about penetrations. Two rules we follow on those homes:
- Never rely on sealant at a stucco to metal joint. It is the most common failure we see, and it fails silently because the water goes behind the stucco where you cannot see it.
- Keep wood away from stucco entirely. Any trim we install near a stucco plane on a bay is PVC. There is no reason to put material in a wet location that decays.
Bay caps and your main roof
If a bay cap is failing, the main roof is usually the same age. That is the practical reason we look at both while we are there. Matching shingles ten years apart is a losing game, and mobilizing twice costs you more than doing the roof replacement and the cap in one project. If your roof has five good years left, we say so and repair only the cap.
What homeowners should check twice a year
- Look up at the cap from the ground with binoculars or a phone camera zoom. Lifted seams, loose shingle tabs and standing debris are all visible from below.
- Check the interior ceiling and wall directly beneath the bay for faint staining.
- Press the bottom corners of the exterior trim. Soft means water has already been there a while.
- After a heavy rain, look for a dirt line or streaking on the wall below the cap edge. That streak is telling you where water is going.
The value case
A bay window with a copper or metal cap is a feature. It shows up in listing photos, it defines the front elevation, and it is one of the details buyers in Buford and Lawrenceville notice. Restored properly, it lifts the whole house. Left alone, it becomes the reason a buyer's inspector writes a paragraph about moisture intrusion.
Working with EZY Exteriors
We are a family owned, licensed and insured exterior contractor with over twenty five years in North Georgia. Every project gets a written scope, photos of the concealed conditions before we cover them, daily cleanup and a workmanship warranty alongside manufacturer coverage. Financing is available when a repair uncovers more than you planned for.
If the trim under your bay window cap is soft, or the paint keeps peeling in the same place, request a written estimate and we will show you exactly where the water is getting in.