
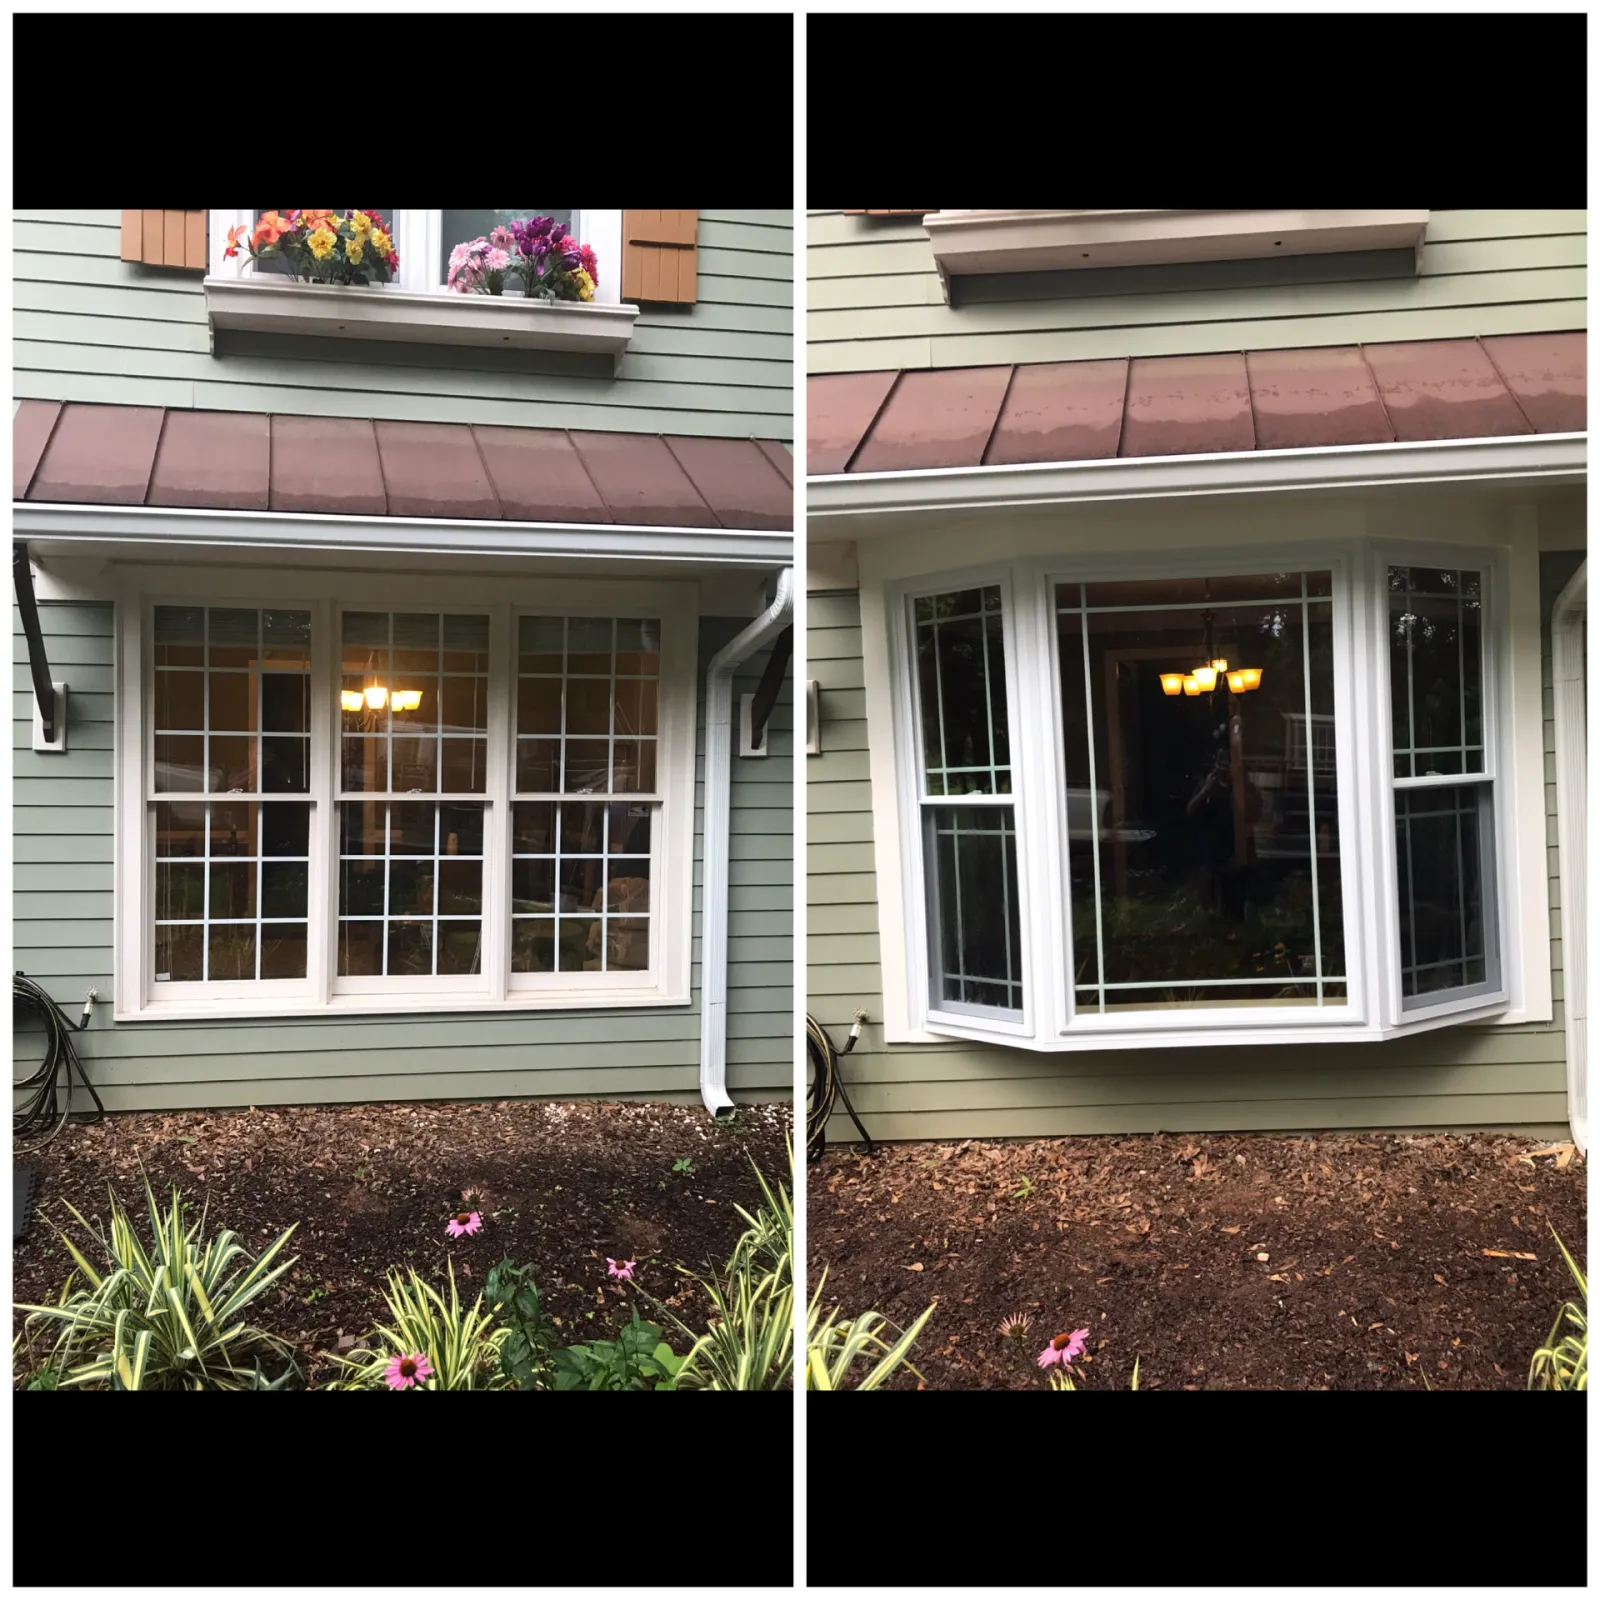
The before and after above is a green siding home near Buford. On the left, a flat triple window sitting under an existing metal awning cap. On the right, a projecting bay window with angled side sashes, tucked under that same cap, with the trim rebuilt and painted white.
It is one of the most requested changes we get from homeowners who like their house but find the front of it flat and dark. Here is what actually happens between those two photos.
What a bay window conversion involves
1. Assessing the wall. Before quoting we determine what is above the window, what the wall framing is, and what the floor system looks like at that location. A bay projects out, so its weight has to land somewhere legitimate: either cantilevered off the floor framing or carried on knee brackets fastened back into structure.
2. Sizing the header. Widening the opening means a new header engineered for the span, with king and jack studs carrying load to the plate. This is the part that makes it a permit job with Gwinnett County. We pull it and manage the inspection.
3. Building the platform. The seat of the bay is a small floor. It gets framed, sheathed, insulated and made level. The underside gets insulated and sealed too, because an uninsulated bay bottom is why old bays feel cold.
4. Setting and flashing the unit. Sill pan turned up at the sides, side flashing under the housewrap, head flashing with end dams over the trim. Sealant only where sealant belongs, and the bottom left open so the assembly can drain.
5. The roof cap. On this project an existing metal awning cap was retained and the bay was built to fit beneath it, which is why the finished result looks original to the house. When there is no cap, we build one: sheathing, ice and water shield, drip edge and either architectural shingles matched by our roofing crew or fabricated metal.
6. Siding, trim and paint. New courses tie in on three faces, trim gets built with proper reveals, cut ends get primed and the whole assembly gets painted through our exterior painting crew.
The details that separate a good bay from a problem one
- Drainage off the cap. Water leaving the cap has to end up in the gutter system or on the ground away from the wall, not streaking down the siding. Look at any older bay in your neighborhood and you can usually see the dirt line where nobody thought about this.
- Kickout flashing where a cap edge meets a wall. Small piece of metal, prevents a very large repair.
- Insulation and air sealing at the seat, the underside and the head. This is invisible and it is the difference between a bay you enjoy in January and a bay you complain about.
- Support fastened into framing. Brackets lagged into sheathing are a failure waiting for the first person who sits on the window seat.
- Trim material. We use cellular PVC and fiber cement, not pine, especially at the bottom corners where water stands.
Why homeowners in Buford ask for this
Buford, Sugar Hill and the Lake Lanier corridor have a lot of homes from the late 1980s through the 2000s with the same builder pattern: a flat front elevation, standard double hung or triple mull windows, and a dark front room. A bay does three things at once:
- Adds light from three directions, which changes how a dining or living room feels all day.
- Creates a seat, a plant shelf or a table nook without adding square footage or touching the foundation.
- Breaks up the flat plane of the elevation, which is what people mean when they say a house has no character.
It is also a natural pairing with other exterior work. If you are already replacing siding with fiber cement or insulated vinyl siding, the wall is open, the crew is on site and the incremental cost of adding a bay is far lower than doing it as a standalone project later.
What to expect on schedule and disruption
- Day one: interior protection, demo, framing. There will be a hole in your wall for part of a day, and we close it before we leave.
- Day two: unit set, flashed, platform insulated, cap work.
- Day three: siding, trim, caulk, prime, paint. Interior drywall return and trim if it is part of the scope.
We protect floors and furniture, contain dust at the opening, and clean up daily. Most homeowners stay in the house for the whole project.
Cost, honestly
Most conversions in our market land between roughly $3,500 and $9,000. The variables that move it:
- Unit size and glass package. A large four panel bay with upgraded low E glass costs meaningfully more than a compact three panel.
- Cap type. Reusing an existing cap, as on this project, saves money. New fabricated metal costs more than shingles.
- Framing and rot. If we open the wall and find water damage, that is repair work on top of the conversion. We photograph and price it before proceeding.
- Siding match. Discontinued color often means repainting the elevation.
Interior finishing
Do not forget the inside. The bay creates a seat depth that needs a finished surface, plus drywall returns, trim and paint. Homeowners commonly choose a wood or engineered seat top, or carry flooring material onto the seat for a built in look. It is worth deciding before framing, because seat height and depth affect the framing.
Working with EZY Exteriors
We are family owned, licensed and insured, with over twenty five years of exterior work across Gwinnett County and North Georgia. Written scope before we start, permits handled, photos of concealed flashing, daily cleanup, workmanship warranty on top of manufacturer coverage, and financing available.
If you have a dark front room and a flat window you have never liked, request a free estimate and we will tell you what your wall can carry and what it would cost.