The call: water where it should not be
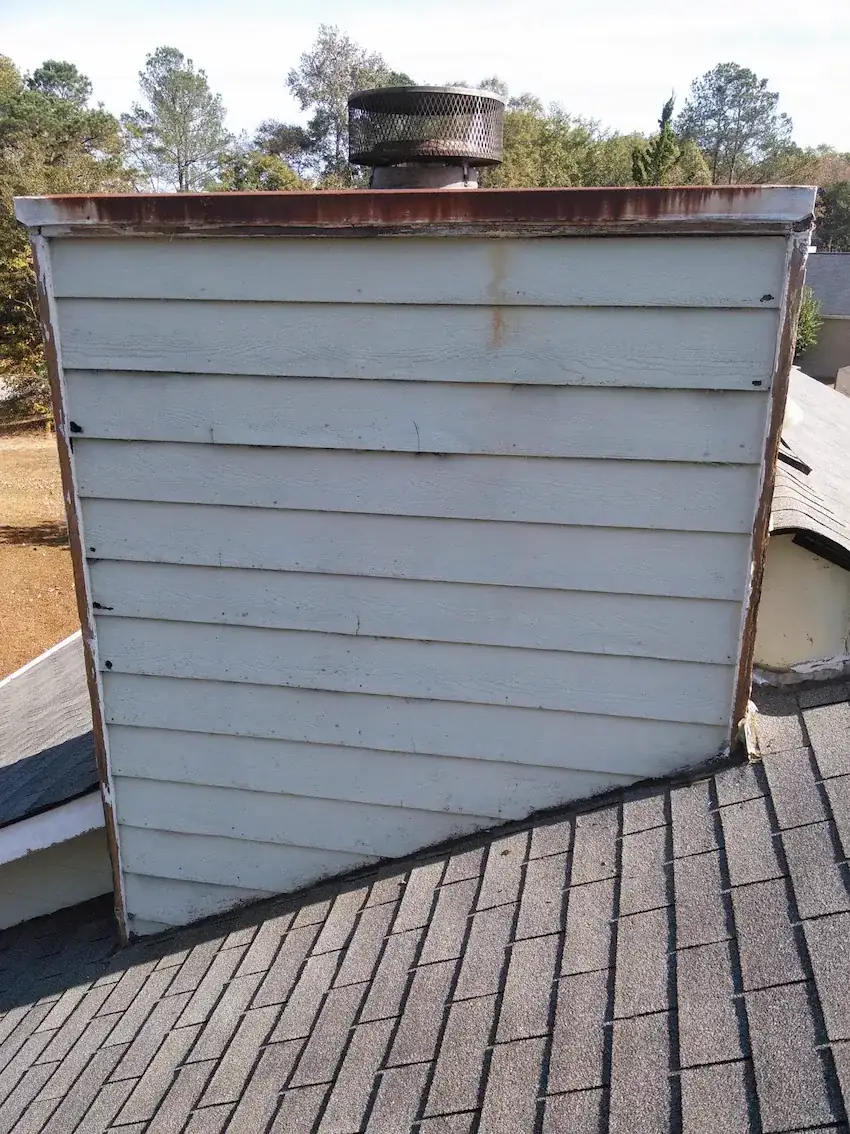
This Loganville homeowner called about a stain that had appeared on an interior wall and a section of exterior siding that felt spongy when pressed. That is the pattern we see constantly, and by the time it is visible inside, the damage outside has usually been developing for a couple of seasons.
We do not quote this kind of work from the driveway. We came out, inspected the elevation, probed the suspect areas, and pulled a small section of siding to see the actual condition before writing anything down.
Diagnosis
The source was a roof-to-wall transition where the original installation had no kick-out flashing. Without that piece, water running down the roof edge gets directed straight into the wall cavity instead of out into the gutter. Every rain, a little more water went behind the siding. The sheathing behind that section had deteriorated, and the framing at the base of the run had begun to take damage as well.
The homeowner's previous repair attempt, done by someone else, had been to caulk the joint. Sealant cannot substitute for flashing at a transition that channels active water. It buys a season.
The repair
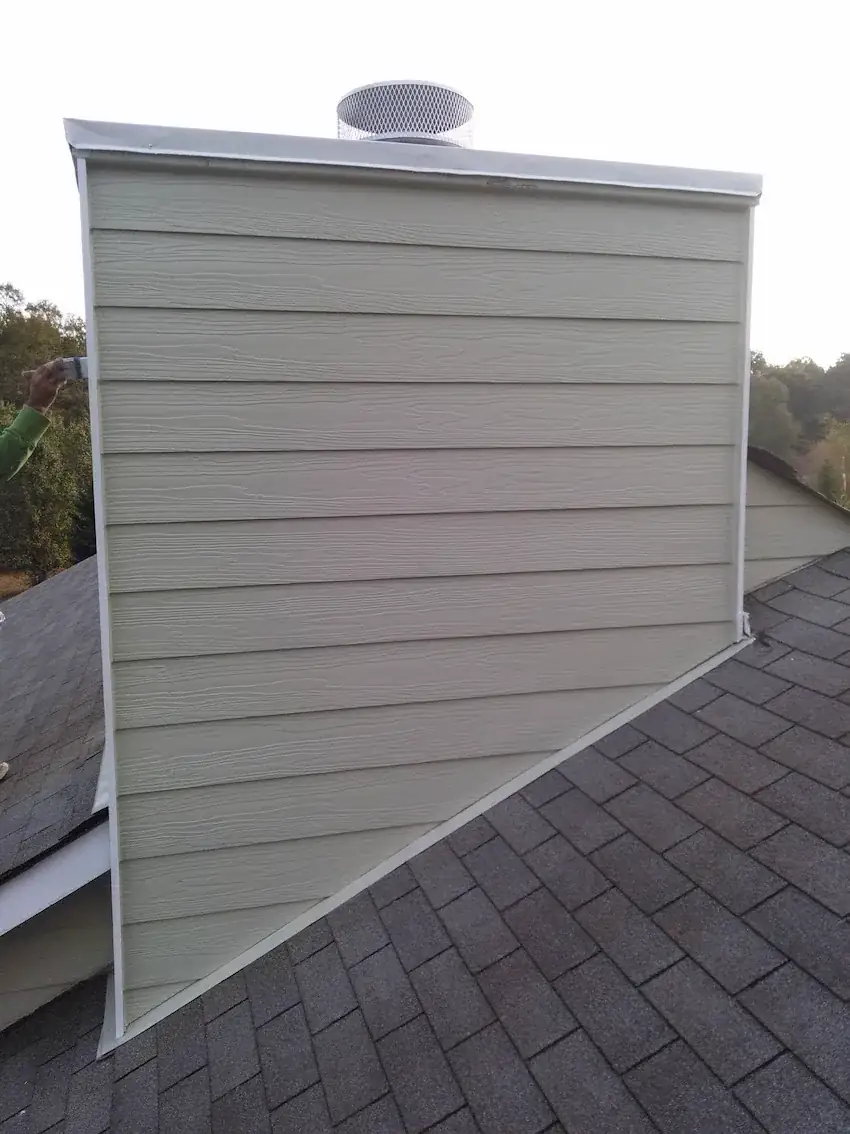
We removed siding and trim well past the visibly damaged area, because compromised sheathing always extends further than the exterior symptom suggests. Damaged sheathing and framing were cut out and replaced with new material. The wall was re-wrapped, the roof-to-wall junction received proper step flashing and a correctly formed kick-out that discharges into the gutter, and the assembly was closed back in with matching siding and trim.
The repaired area was primed and painted to blend, and the finished wall does not read as a patch from the street.
Documentation and prevention
We photographed every stage, including what was behind the wall, and gave the homeowner the full set. On the walk-through we also flagged two other transitions on the house with the same original detail. Neither had failed yet. Both got kick-outs while we were on site, which is a small cost now and a five-figure avoided repair later. That is the difference between fixing a leak and fixing the reason for the leak.
Repair work done the way replacement work is done
Repairs are where corners get cut in this trade, because the job is small and the homeowner usually cannot see what is behind the patch. We treat them the same way we treat a full re-side: open it up, find the actual source, fix the cause, then close it back in so the repair blends.
Most exterior repairs we get called for trace back to one of a handful of causes:
- Missing or wrong flashing at a roof-to-wall junction, window head or deck ledger, letting water in behind otherwise sound siding.
- Failed sealant at trim joints and penetrations, which lets wind-driven rain sit against end grain.
- Ground and irrigation contact, where sprinklers or grade keep the bottom courses damp until they fail.
- Gutter problems, where overflowing or disconnected gutters dump water down one wall until the sheathing behind it turns to sponge.
- Woodpeckers, wasps and rodents exploiting a soft spot that started as a small paint failure.
Our repair process
- 1.Diagnose before quoting. We probe and inspect so the estimate reflects the real problem, not the visible symptom.
- 2.Open the assembly. Siding and trim come off far enough to expose all compromised material.
- 3.Replace what is compromised. Sheathing, framing, trim and siding, matched to the existing profile as closely as the product line allows.
- 4.Correct the cause. New flashing, corrected laps, sealed penetrations, adjusted drainage. Otherwise the repair fails again in the same spot.
- 5.Blend the finish. Prime and paint to match, or install matching panel so the repair does not read as a patch from the street.
- 6.Document it. Photos of what was behind the wall, so the homeowner knows exactly what they paid for.
What it costs and how long it takes
Most targeted repairs are one to three days. The honest answer on price is that it depends on what is behind the siding, so we quote a scope with a clear allowance and get approval before expanding it. If we open a wall and find the problem is bigger than the estimate, the homeowner hears it that hour, with photos, not at the end.
How we work with homeowners
EZY Exteriors was founded by a craftsman, not a call center, and the way we run a job reflects that. Every estimate is free, and it is a real written scope rather than a number scribbled on a card. We tell you what we found, what we are replacing, what we are not touching and what the allowance is if we open a wall and discover more than the photos showed. Pricing is straight. There are no same-day discounts, no financing pressure and no scare tactics about your roof failing next week.
Our crews are vetted, experienced installers who do this work every day, and a project manager stays on the job so questions get answered by someone who has actually been on site. We document work in progress with photos, including the parts that get covered back up, so you know what you paid for.
We do not process insurance claims and we are not adjusters. What we will do is inspect, document what we find and give you a clear scope you can hand to your carrier if the damage is genuinely storm related. If it is normal wear, we will tell you that too.
Considering a similar exterior repair project?
If you are in Loganville and looking at a exterior repair project on your own home, the fastest path is a free on-site estimate. We will walk the exterior with you, point out what is actually failing and what has life left, explain the material options in plain terms and put a written scope and price in your hands. There is no obligation and no follow-up pressure.
Photos of finished work like this one are the best way to judge a contractor, so browse our other projects, read our homeowner reviews, and then reach out when you are ready. We serve Loganville and the surrounding communities, and we are happy to tell you when a repair is the smarter spend than a replacement.
Project photos